This page is here to help you understand Lightpad better.
- Timeflow overview tour on Timeflow.
- Initial Setup Guide for ideas on how to set up Lightpad if you're starting from scratch.
- Install on mobiles — how to install Lightpad on mobiles.
- Install on a computer — how to install Lightpad on laptops and desktops.
- Calendars sync
- Reschedule
- Tags & tagging
- Supertags
- Recurring events
- Notes
- Hotkeys
- Update app / reset local data
- Troubleshooting
- Data export
If you have any difficulty with anything – we're willing to help. Reach us on Twitter / Reddit / Instagram / Facebook or by email at hello@lightpad.ai
Timeflow Basics
We call our main calendar view Timeflow. Read this text or watch a video below to learn how you can use it.
What's what
The default unit of time for Timeflow is a day. So every figure in the ascending row represents a day. The circles under it represent the day's tasks and events. Complete tasks and events appear as filled, tasks to be done as empty. These figures are also called time units as they represent not only days but also hours, weeks, months, and years.
Scrolling
Time is a continuous dimension, right? It doesn't wrap when a week ends, it still goes forward. With Timeflow you can simply scroll through it. It's only vertical scrolling, for now. You can also use up and down arrow keys.
Status
On the top of the screen, you can see the status bar. Uppercase text displays the current date (time unit). A tiny bit under it is a control to get back to today (if the current date isn't today).
Units of time
The default unit of time for Timeflow is a day. But it can also display weeks, hours, months, and years. You can find the time-unit-type switch right under the status.
Time unit's agenda
To see the time-unit's agenda simply tap on it. Or press enter key. This will open the list of all time-unit's tasks. To close the agenda – click on the background, or on the cross sign in the upper right corner of the UI. Or press escape. If you're editing a task – press escape twice. The first escape will remove focus from the task, second will close the agenda.
Events & tasks
You can add, edit, and archive tasks and events.
As of April 2024, there is no distinction between tasks and events yet. For events downloaded from Google Calendar, it's preserved as-is.
Adding tasks
To create tasks you need to open the time-unit's agenda. Press the "+" sign in the status bar area. Alternatively press n key. This will add a new task and put the cursor into the gist field. Also if you press enter while editing the task's gist this will create a new task under it. This allows to populate time-unit agenda rapidly.
Tasks time
Press "0h" on the right of the task. A time input should show up.
Tasks details and archiving
In the control group on the top press "expand all" to see tasks details. This allows you to edit tasks descriptions and tags, to see attendees and a Google Calendar link, and use the archive button. Alternatively, you can archive a task by deleting its gist and pressing backspace (delete on mac) once.
I think that's all for starters. Further topics: tags and tagging, syncing with other calendars, scheduling, recurring tasks, notes, hotkeys.
Initial Setup Guide
Install Lightpad
Lightpad is a Progressive Web App (PWA). It looks like a native app, works offline and it's safer than regular apps (it can't track you).
All you need to do is to press the share button and then look for "Add to home screen" button.
Learn more about PWA in this Wikipedia article.
It can also be installed on a Mac/PC/Linux as Chrome app.
For iOS or Android
For Desktops and Laptops
MacOS / Windows and Linux support Chrome apps. Open Lightpad.ai in Google Chrome, log in, and you should see install icon at the end of address bar, just click it. If you don't see it: press three-dot options button, then "install Lightpad".
Installation videos were produced by Angry Eggplant
P.S. We want to bring you and us the best planning experience which includes native apps. At the moment we're tight on resources, and we prioritize more potent development routes. Your voice in our media and support will help us greatly and will accelerate the development of the software!
Calendars sync
Lightpad can sync with Google Calendar and through it – with other calendars.
Google Calendar Sync
You can sync Lightpad with Google Calendar. Log into Lightpad on your desktop or laptop and find the "GCal sync" button in the left menu. Press it, choose the Google account you want to sync with, then choose calendars you want to sync. Find the "Start sync" button at the bottom of the page and press it. Sync may take a minute. When it's done – it will show the success message. Done.
Outlook Calendar Sync
You can sync Lightpad with Outlook Calendar, albeit not directly, but still this can work efficiently. You can do so using Google Calendar as a relay. Here's how:
Step one – ensure you have a Google Account and ensure your Outlook app is synchronized with it.
Step two – sync Lightpad with Google Calendar as described in the section above.
Multiple Google accounts
Did you know – you can have calendars from multiple Google accounts linked to a single Lightpad account? Here's a 2-minute recipe for the desktop web version of Google Calendar:
- Make your secondary account calendar accessible to the primary account (the one you use with Lightpad).
- Open Google Calendar, log in with your secondary account (secondary@protonmail.com)
- Left pane – go to settings for on the primary calendar, find the section "Share with specific people", add your primary account there (paste primary@protonmail.com, hit enter).
- On the same page – find the "Integrate calendar" section and copy the URL captioned "Secret address in iCal format" (the last one). Step 1/3 complete.
- From your primary Google account (the one you use for Lightpad), subscribe to the secondary account's calendar
- In Google Calendar, log in as primary@protonmail.com.
- On the left pane look for the "Other calendars" label, click the plus sign near it.
- Choose "From URL", paste the link you have in buffer here, hit enter. Step 2/3 complete.
- In Lightpad re-sync Google Calendar
- Left pane – click on the gear wheel near Gcal
- Now you should be able to see both primary Google account calendars and linked calendars from the secondary account. Choose all you want and click sync. Step 3/3 complete.
Done. In a few seconds, you should be able to see calendars from your other Google accounts. This is a new explainer, so feel free to reach us at hello@lightpad.ai if anything is unclear.
Reschedule events
Want to change the event starting hour? Go into the time-unit agenda, and click on the hour input on the right of the event.
Want to move the event into a different time unit? On a desktop, you can simply drag an event into another time-unit. Two other options for rescheduling tasks:
- Reschedule a single task in Timeflow – open day details, then hover over a task (or press on it on mobile) and click the [re] button at the end of the task. Then click on a date on which you want to put the task.
- Reschedule all incomplete tasks in a time-unit – click on a date and press "reschedule all". Lightpad will take all incomplete tasks from the time-unit and will hide the time-unit agenda. It will allow you to pick new time-units for each task from the group.
Watch this video for instruction.
Tags and tagging
To tag a task – ensure it's expanded (click expand all in time-unit agenda controls), click on the "Default tag" label (under the gist), and type a tag's title. Next time you will see this tag in the autocomplete options.
You can manage tags from their own menu on the left of the Timeflow status. Click "manage tags" to open the tags list. Click on the pencil icon on the right of a tag to open the tag editor layer. In the tag editor, you can adjust the tag's title, background gradient, colors, and time zone.
You can pin important tags in the tags editor by clicking the star icon in the top right corner of the white pane.
To archive a tag – click on the eraser icon in the lower right corner of the white pane.
Exit the tag editor by clicking the "OK" button in the lower-left corner or by pressing "escape".
The tags list allows to add a tag by clicking the corresponding button in the lower-left corner.
Click on the tag title inside or outside the tags list, to get onto this tag. All new tasks and notes created here – will get this tag. To get off the tag – click the [reset] button on the right of the tag's title.
Supertags
Supertags are one of the premium features in Lightpad. They're also known as nested tags or hierarchical tags. When you tag a note or task – just press `Tab` to create a child tag. Press `shift + tab` to generalise tag, this will undo the last child you've entered and will bring focus back to parent.
Recurring events
Lightpad can display recurring events imported from Google Calendar. No editor for recurrence yet.
Notes
You can write notes on the notes page or tab. Select text and the styling options menu will pop up. Notes have focus mode – look at the icon in the upper-right corner. Focus-mode has different color shade settings – look at the lower left corner. Exit focus mode by pressing escape (two times) or clicking on the cross icon in the upper right corner.
Hotkeys
You can do most of the stuff with enter, escape, n, arrow keys and tab.
| key | actions |
|---|---|
| escape | If inside a focused element (e.g. you're editing a task's gist) – removes the cursor from the element. When nothing is focused, escape will close the uppermost layer. So it will close the time-unit agenda, user profile, or a focus mode. |
| n | Use it to create a new task or a note. Works inside time-unit agenda, on the notes and tasks pages. |
| enter | When focused on a time-unit – will open its agenda. When inside a task's gist – will create a new task in the same time group. |
| arrow keys | In Timeflow – scrolls the page. You can also use the spacebar. |
| backspace | Inside an empty task's gist – will archive it. |
Update app / reset local data
Sometimes a client app won't update after we roll out a new version on our server. For that case you have the [Reload app] button in user profile. For the desktop app – open user profile (your name/email in the upper left corner), find and press [Reload app] button.
For mobile devices – find the same button in the burger menu.
Troubleshooting
Most of the problems can be fixed by resetting local data. Please refer to the app reload section.
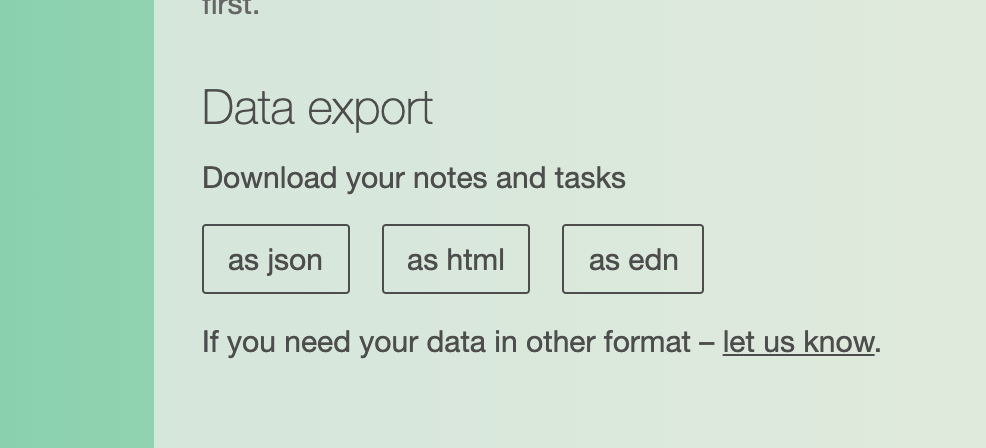
Data export
You can download your data anytime. Open the desktop app or the website on a desktop / laptop, log in and click on your username in the upper left corner. In the popup look "Data export". Click on any button and save your data. Done!
End
Back to the table of contentsOh hey! You've reached the guide end. Congrats!
If your question is still unanswered – please ask us! Even if you think it's a stupid one. This will only help us to improve – for you and others. Reach us on Twitter / Reddit / Instagram / Facebook or by email at hello@lightpad.ai
Cheers and have a nice day!